recently i'm checking dx11 features and one of the nice thing he have is read/write/structured buffers. (unlike shader model 4 that have read only buffers)
read/write buffer (or RWBuffer) is just as it sounds, a buffer that we can use to read from or/and write into.
structured buffers (or SB) is a buffer that contains elements (c style structs), for example:
struct MyStruct
{
float4 color;
float4 normal;
};
then, we can use it like this:
StructuredBuffer mySB;
mySB[0].Normal = something
RWSB have another nice feature, it have internal counter that we can increment/decrement its value.
those buffers can be used to create very nice effects and really fast (if used wisely).
this time i'm using it to solve some old problem in computer graphics:
order independent transparency (or OIT), if you don't know what i'm talking about then i suggest you should google on it...
in dxsdk you can find a sample called OIT, this sample uses compute shader to solve this problem, the sample show you how you should NOT use compute shader! and just show you that its possible using it... this sample runs so slow that you better do a software solution for it ;)
one thing you should remember is: if you write your pixel shader good enough, you probably get better performance than using compute shader (with some exception off course)
anyway, the question i want to answer is: how can we draw transparent surfaces without worrying about the order?
there are few solution to this but every one of them have some drawback:
1. depth peeling - very heavy, even if using dual version.
reverse depth peeling is more friendly as it peel layers from back to front so we can blend immediately with the backbuffer and only use one buffer for it.
2. stencil routed k buffer - say goodbye to your stencil and allow you up to 16 fragments to be blended, for some of you its enough for the some its not an option.
3. dx11 method, based on the idea presented on gdc2010 by ati.
i will focus on 3 as its what i implemented and it doesn't suffer from the issues the other methods is.
the idea can be simplify into 2 main steps:
1. build - in this step we build linked list for every fragment that contains all the fragments that "fall" on this fragment screen position, i use RWBuffer to store the linked list head for that pixel, and another 2 RWBuffers to store pixel attributes (color, depth and next "pointer" to the next fragment in the list), those attributes buffers need to be big enough to contain all the fragments that placed at the same fragment position.
in this step i'm also using the structured buffer internal counter to get unique "id" for each fragment and use it to write/read the fragments attributes.
2. resolve - this is where we do the magic, here i just traverse the linked list stored in step 1, and sort the fragments, then i manually blend the fragments.
note that you need to sort the fragments in place! that means your linked list should be accessed a lot or... you can simply fill a bunch of registered, and sort them instead.
tip: use the [earlydepthstencil] attribute to skip pixels that aren't needed to be processed.
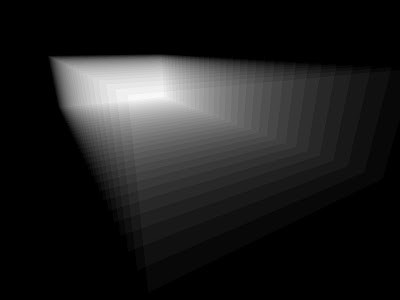
here is a screenshots that show it in action using 32 registers (max of 32 fragments per screen fragment)
 debug mode that shows the fragments count in each of the fragments linked list
black means 0 fragments, white means 32 fragments (num_fragments/max_fragments)
yes i know, this 32 surfaces can be easily sorted and rendered correctly without the GPU, but here i'm not sorting and not worrying about the order! i'm just rendered them as one batch, maybe next time i will show complex geometry... ;)
